In this tutorial we'll see how to download and install PostgreSQL database on Windows 10.
Downloading Postgre
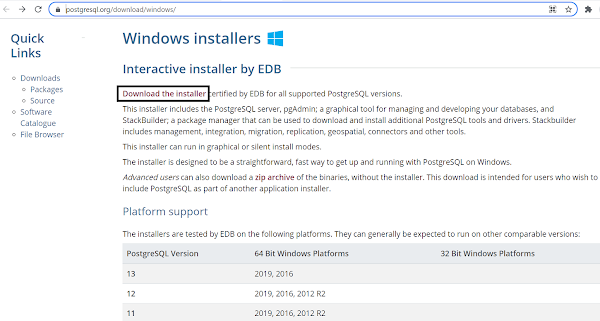
You can download PostgreSQL installer from the URL given below-
https://www.postgresql.org/download/windows/Click on Download the installer.
In the next page Select the version of PostgreSQL you want to download by clicking on download button. Select the location where you want to download the exe file.
PostgreSQL Installation Steps
1. Go to the location where you have downloaded the .exe file and double click to start the installation process. In the setup window click on next.
In the installation directory window, you can change the location where PostgreSQL will be installed. Change the installation directory if required otherwise let it be default and click next.
2. In the next window you can select the components you want to install. Installer includes the following component
- PostgreSQL server- DB server
- pgAdmin 4- A graphical tool for managing and working with PostgreSQL databases.
- StackBuilder- A package manager that can be used to download and install additional PostgreSQL tools and drivers.
- Command Line tools- Installs command line tools and client libraries.
3. Next you are asked to select the location where your data is stored. Change if required otherwise let it be default selection. Click next.
4. In the next window you need to provide a password for the super user. Do make a note of it as you will be required to enter this password while working with DB. Click next.
5. In the next window you need to select the port number the DB server should listen to. Change if required or you can do with default port.
6. In the next window you can select the locale to be used by the new DB cluster.
7. With all the options selected you are shown the summary of it for one final confirmation. Click next and again next to start the installation or go back to change any option if required.
8. Once the installation completes you should get a setup window confirming the same. Uncheck the option to launch StackBuilder at exit and click on finish to end the installation process.
9. Starting PostgreSQL
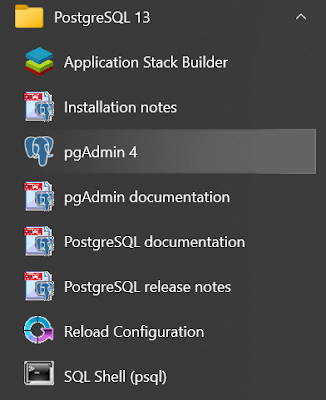
In the start menu you should get the menu option for PostgreSQL after the completion of installation process. Click on pgAdmin 4 to start the graphical tool to connect to PostgreSQL Server.
You are prompted to enter the master password when you open the window for the first time after starting the application. Once you set the master password, all the existing saved passwords will be re-encrypted using the master password.
After setting the master password in the left pane click on server and you will be asked to enter the password to connect to the server. Here you need to enter the super user password set during installation.
That will take you to the dashboard.
Using SQL Shell to connect to Postgres DB
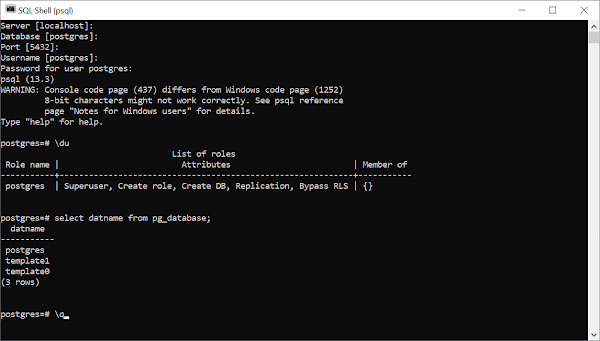
Apart from pgAdmin4 which is a graphical interface for working with DB you can also use command line tool SQL Shell (psql). Select that menu option and keep pressing enter once the SQL shell is opened to select default option, enter super user password once prompted for that.
That's all for this topic How to Install PostgreSQL on Windows. If you have any doubt or any suggestions to make please drop a comment. Thanks!
You may also like-


No comments:
Post a Comment