This post shows how you can add Apache Tomcat server to the Eclipse IDE and start and stop it from Eclipse IDE itself.
Downloading Apache Tomcat Server
If you don’t have Tomcat server yet you can download it from here- https://tomcat.apache.org/download-90.cgi
Latest version at the time of writing this post is 9.0.10.
Once downloaded, extract it to a folder.
Adding Tomcat server to Eclipse
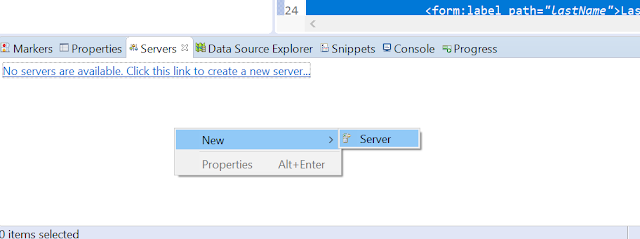
In Eclipse IDE, go to Servers tab and in the Server area- Right click – New – Server
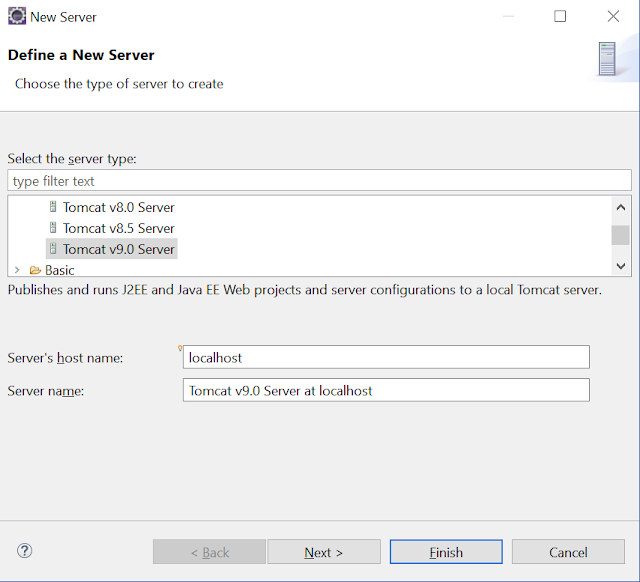
In the opened “Define a New Server” window expand Apache and select the Tomcat version you want to configure. For example if you have downloaded Tomcat 9.x version then select Tomcat v9.0 Server. Click Next.
In the next window browse to the directory where you have extracted your downloaded Tomcat server. Ensure that the correct Java version is also selected.
If you already specified some resources to run with Tomcat, in the next window you get a chance to add those resources to the configured Tomcat server. For example I already have one Spring Web MVC application configured to run on Tomcat server so I can add it to the configured server in this window. Click Finish.
You should see a new Tomcat server added in the Server area. On double clicking it you can see the configuration for the server and right clicking it will give you option to start, stop, clean etc.
That's all for this topic Adding Tomcat Server to Eclipse. If you have any doubt or any suggestions to make please drop a comment. Thanks!
>>>Return to Java Advanced Tutorial Page
Related Topics
You may also like-


